Learning Path: Beginner, Part 1
Table of Contents
Step 1 | Headjoints and Posture
Step 1a | 3 Tips for Positioning Your Flute Headjoint
Step 1b | How to Play Flute with Good Posture
Step 2 | Embouchure and Articulation
Step 2a | Embouchure Foundations, Part 1
Step 2b | Articulation in Irish Traditional Music
Step 3 | ABC Notation and Fingering Charts
Step 3a | How to Read ABC Notation in Irish Traditional Music
Step 3b | Boehm Flute Fingering Chart
Step 3c | Irish Flute Fingering Chart
Step 3d | Octave Exercises
Step 4 | The D Major Scale
Step 4a | D Major Scale for Beginners
Step 4b | D Major Scale and Exercises
Step 5 | The Rattling Bog
Step 5a | How to Learn by Ear
Step 5b | Play Along: The Rattling Bog
Step 6 | In Closing
Step 6a | Celebrate and Communicate
Step 6b | What’s Next?
Step 1
Headjoints and Posture

Step 1a
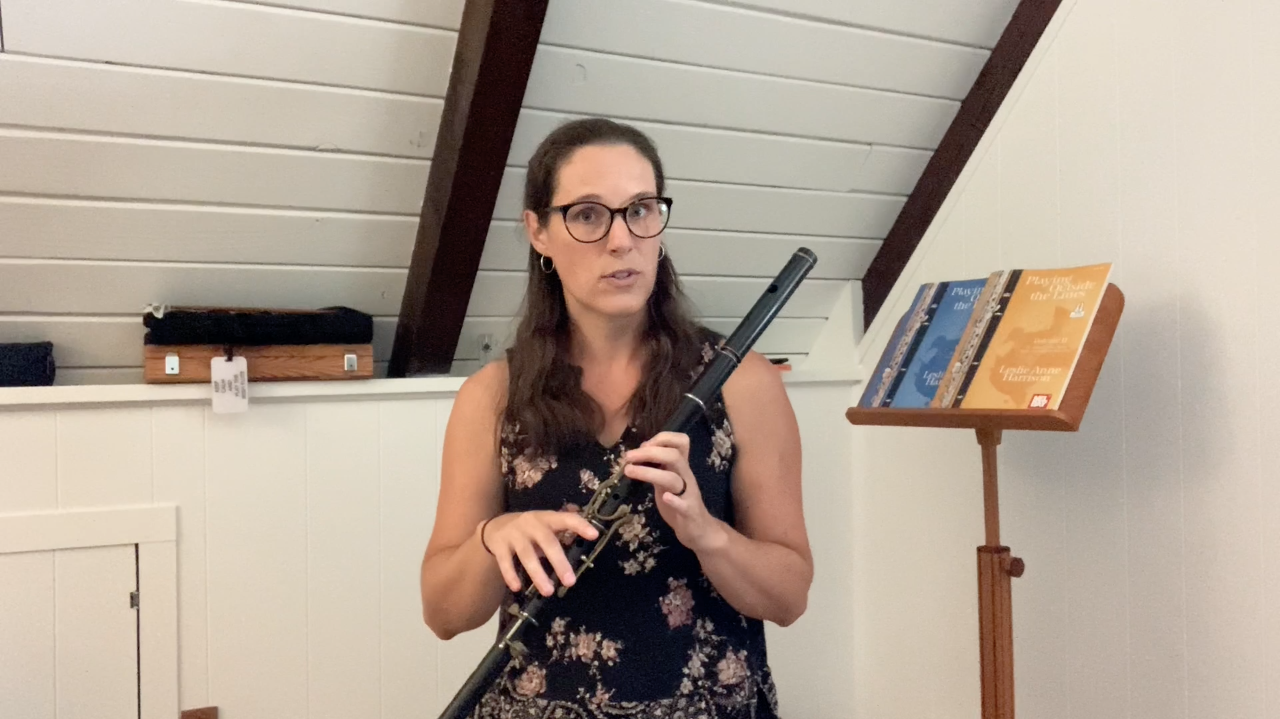
Good positioning of your flute headjoint is one of the first and most important things to consider. This will look and feel differently from person to person, but there are a few issues you’ll want to consider before getting started.
Even if you’re an experienced player, you might consider turning your headjoint to a different position when playing Irish traditional music.
The article below will walk you through three tips to get you started.
Takeaways:
Periodically check the cork placement in your headjoint with a cleaning rod.
Experiment with rotating your headjoint in and out—that is, towards your body and away from your body. Be careful not to choke off your own sound when rolling in.
Using a tuner, tune Boehm (classical/silver) flutes to an A. Tune simple system (Irish) flutes to a D’. Pull the headjoint out if you’re sharp (above pitch). Push the headjoint in if you’re flat (below pitch).

Step 1b
Good posture makes a huge difference to breathing, tone, and technique. Watch this video to learn about good posture, how to hold the flute, and why this matters.

Takeaways:
Sit up straight but be sure your lower back doesn't bow forward.
Think about whether you want to hold your flute using the counterpressure or gravity method. My personal preference is for the gravity method.
Use your metacarpophlangeal joint (MCP) to create a great left hook to hold the flute.
Consider turning slightly to the left to alleviate tension in the left hand.
Make sure your back is nice and strong. No slumping forward into your computer posture.

Step 2
Embouchure

Step 2a
An embouchure is the shape you make with your mouth when playing the flute. Developing a good embouchure is a very important part of flute playing and has great influence on tone quality and control, breathing and note extension, colors and dynamics, and a whole lot more.
There are two schools of thought when it comes to embouchure formation. I call them corner-based embouchures and center-based embouchures. I’ve played with both. I played with a corner-based embouchure for more than a decade before switching to a center-based embouchure.
Center-based embouchures can be very flexible, and as such, are able to move into a variety of shapes that can exert greater control over playing in different registers (high, middle, and low notes), using different dynamics (loud, medium, and soft), and creating different tone colors (dark green to pale yellow timbres).
I consider there to be three primary shapes on the center-based embouchure spectrum. The video below walks you through some of these concepts and shows you how to find a good center-based neutral embouchure. This is the first and most important of the three primary shapes available to center-based embouchures.

Takeaways:
Everyone’s body and goals are different. This can lead to a variety of embouchure shapes.
Corner-based embouchures are created by smiling or frowning. These embouchures are directed by the already-strong corners of the mouth, but can be more static.
Center-based embouchures are created by using the center of the lips to bear down on the airstream. These embouchures are directed by muscles in the center of the mouth which are often less developed, but can be more flexible in the long run.
A neutral embouchure is the first of the three primary center-based embouchure shapes.
To find a neutral embouchure, say “tunnnnnnnne", then play a D’.
Before moving onwards, make sure your neutral embouchure shape has the potential for a) flexibility, and b) strength. Use the tests suggested in the video to check for these.

Step 2b
There are some important considerations for articulation in Irish traditional flute playing. Articulation refers to how a note is begun. Read the article below to gain an understanding of how articulation is used in Irish flute playing, and how it might be different than what you’ve used before.

Takeaways:
The default articulation in western class music is to tongue the beginning of every note unless marked otherwise.
In contrast, Irish traditional music tends to be played slurred together.
Most of the music on this site (and beyond this site) will not have slurs marked in. It is understood that you should slur everything together be default.
If you need to tongue repeated notes, do not use “too.” Try a softer “doo” instead.

Step 3
ABC Notation and Fingering Charts

Step 3a
Boehm and Irish flutes have slightly different fingerings, primarily on F# and C natural. You’ll find fingering charts for both instruments below. Since Irish traditional music stays primarily in a few scales and modes, the fingering charts cover just the notes you’ll need.
You’ll see ABC Notation on the fingering charts (D, D’, etc), and you’ll also often see it in Irish traditional music. This is a notation system used by a lot of Irish traditional musicians. For this reason, I’ve included ABC Notation in a lot of the sheet music on this site.
An uppercase letter (D, for instance) means to play the note low (these are the notes that tend to come out pretty naturally). An uppercase letter with an apostrophe (D’) means to play that note high (these notes require more air, so you’ll have to blow harder).
A low and a high note that have the same name (D and D’, for example) are called octaves.
You’ll see on the fingering charts below that many fingerings are the same for both the low and high octaves (E/E’, F#/F#’, etc). The primary difference in playing the low or high octave is in how you blow air into the flute (and how you shape your embouchure, but we’ll discuss that more in a future learning path).
In general, use low air pressure (blow softer) for the low octave. Use high air pressure (blow harder) for the high octave.
If you’d like to learn more about ABC Notation, check out my article on the subject below.


Step 3b
If you play a simple system (Irish) flute, skip ahead to Step 3c.
If you play a Boehm (silver/classical) flute, be sure to check out your fingering chart and watch this video in order to learn about some helpful fingerings!
You’ll want to pay special attention to F#. Switching this fingering slightly when playing Irish traditional music can be very helpful with ornaments and techniques down the road.
Remember when reading this fingering chart that many fingerings are used for both the low octave (denoted with an uppercase letter) and the high octave (denoted with an uppercase letter followed by an apostrophe).


Step 3c
If you play an Irish flute, be sure to double check your fingering chart and watch this video for some notes to watch out for. I’ll also mention additional C natural options that are not included on this fingering chart.


Step 3d
Since so many fingerings are used to play notes both in the low and high octaves, it’s good to practice playing those octaves. The exercise below provides some practice for you.
Remember, use low air pressure (blow softer) for the low octave. Use high air pressure (blow harder) for the high octave.


Step 4
The D Major Scale

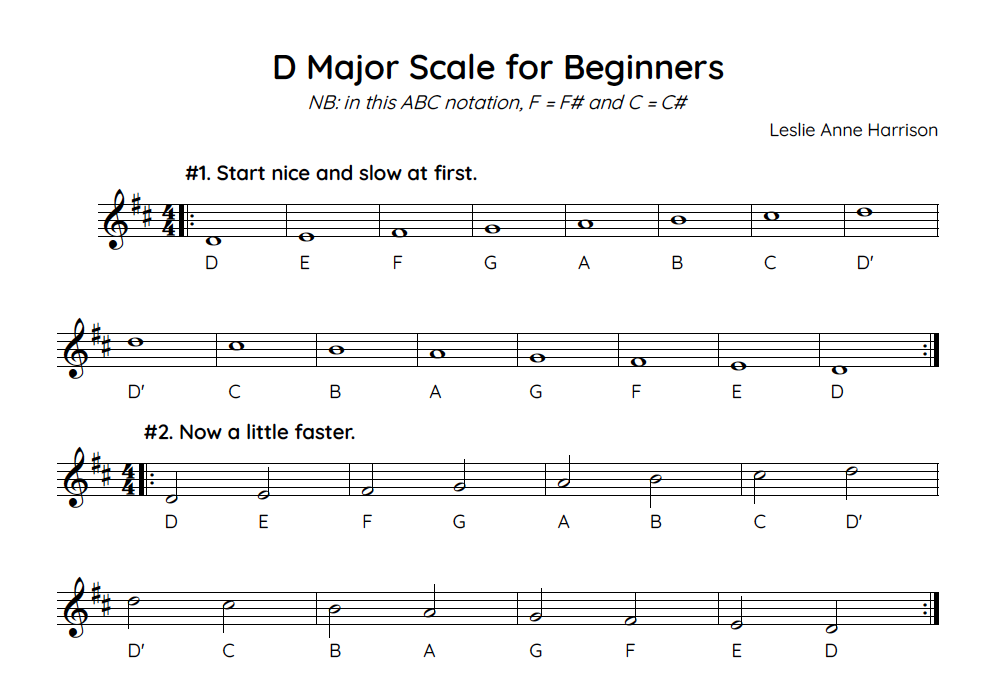
Step 4a
The D Major scale is a very common key in Irish traditional tunes. It uses D, E, F(#), G, A, B, C(#), and D’.
Make sure you are using C#, not C naturals, in a D Major scale.
F#s are most common Irish traditional music (in fact, unkeyed Irish flutes don’t have an easy way to play F naturals), so if you see something notated just as F in ABC notation, or you hear me say just F in a video, this means F#. The fact that F refers to F# is almost always a given in Irish traditional music.
If you’re a new beginner, you can start with these exercises and then skip to Step 5. If you’re a more experienced player who is delving into Irish music for the first time, feel free to skip ahead to Step 4b.

Step 4b
These are for more experienced players. If you’re a newer beginner, feel free to skip them and jump ahead to Step 5.


Step 5
The Rattling Bog

Step 5a
In the video below, I talk about how to learn by ear and I teach you The Rattling Bog in the process. This tune is a polka in the key of D Major. It is short and sweet, and it is a very common tune to learn when you’re first starting out.
Learning by ear is one of the hallmarks of Irish traditional music, and I encourage you to learn your tunes by ear—at least eventually. However, if you don’t want to learn by ear yet, that’s okay. There is sheet music for you below. (I was an exclusively visual learner for many years, so I understand.)
Although I learned by sight for many years, I eventually switched to learning by ear, and it is now one of my favorite things about Irish traditional music. It’s also pretty great not having to worry about lost sheet music when all your tunes are already stored in your brain. So, give it a try whenever you feel ready!
Whichever way you choose to learn, you’ll notice The Rattling Bog has some stuff you just practiced. It uses an octave jump (A/A’) from Step 3d and the D Major scale from Step 4.
If you already know the tune, watch the video anyways to learn how to break down and learn tunes by ear. Knowing the tune already will make this a piece of cake.
In the video, I talk about tune mapping. Tune mapping is my system of identifying and learning call-and-response phrases rather than long strings of notes. I use tune mapping in all the Slow Tune Learning videos on this site.
Analyzing phrases through tune mapping often shows us that a complicated-sounding tune can actually be reduced down to just a few phrases. In other words, tune mapping provides the lowest common denominator of a tune.
Tunes are often split into A parts and B parts (some even have C, D, and E parts). Usually, A and B parts are the same length, but the melody in each is different. To make a tune map, I start with the A and B parts of a tune, which I notate like this:
A:
B:
I then listen for the call-and-response phrases in each part, and give each phrase a number. The first phrase in the A part is A1, the second phrase is A2, etc. Sometimes, a phrase comes back and is repeated.
For instance, the tune map for The Rattling Bog looks like this:
A: A1 A2 A1 A3
B: B1 B2 B1 B3
So, we now know that to play The Rattling Bog, you only need to learn six short phrases! Piece of cake. I’ll teach each phrase to you in the video below.


Takeaways:
If learning by ear, be aware that ears can get full. Give yourself rests if need be.
Tune mapping is a method of learning a tune by phrases, rather than strings of notes. It is used in the Slow Tune Learning videos on this site.

Step 5b
Practicing routinely is important for tune retention. In other words, practicing moves a tune from your short-term memory to your long-term memory. That’s a good thing! Once it’s in your long-term memory it will always be there when you need it, just like an old friend.
Play along to the video below (as often as you’d like) in order to help you retain The Rattling Bog. You can change the speed of the video by clicking the gear icon in the lower right corner.


Step 6
In Closing

Step 6a
Time to celebrate and communicate! Go ahead and throw yourself a party, you’ve just completed Learning Path: Beginner, Part 1!
You can also hop over to our private Facebook group and let us know! You’ve definitely earned some bragging rights. :-) You can also post questions or comments there and see what others (or me) have to say.

Step 6b
What’s next?
Look below for my recommended next step, a review list of the companion resources covered in this learning path, and/or a chance to browse and discover something new on your own.


© Leslie Anne Harrison 2019-2022. All rights reserved.
Finding the ideal placement for a flute headjoint has important ramifications for intonation and tone quality—and as a result, for ease and enjoyment of playing as well. Positioning of headjoints can often be a matter of personal preference, depending not only on the flute, but on the shape of a player's mouth and the tone quality they wish to achieve. Here are some ideas with which to get started.